This post orignally apperaed on my Medium blog on Aug 20, 2020
There is one thing I keep hearing consistently at bootcamp:
I don’t know why I didn’t start planning out my apps sooner.
Planning takes time, and it can feel like a waste of time when you’re excited to get to coding and it doesn’t seem like “the point” of the project. So many of us avoid it.
However, in bootcamp like in any work situation, planning is crucial. It saves time, leads to better code and a better end product in general, and saves a lot of frustration in the process of coding.
However, I know that properly planning for a software engineering bootcamp project can be daunting as it involves basic UX design and product management skills that are not central to a coding course.
Here are steps to get a basic plan in place.
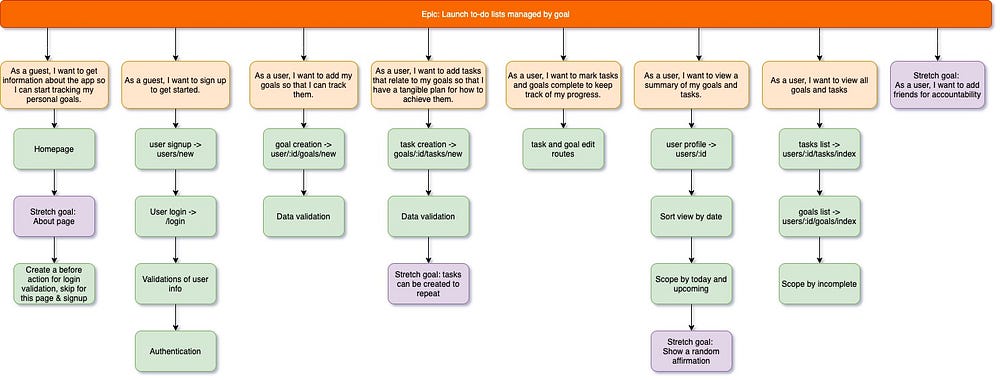
Step 1: User Stories
Starting with a clear, robust user story puts the user front and center of the app. Even if as students we are not planning on monetizing our apps, or even having anyone use them regularly, it’s still important to put the user first to give context for development.
From my perspective, I think this is incredibly important even for the simplest app because it encourages creative problem solving. The best problem solving starts with thinking about the why and the intended end result, instead of going too quickly into the technical details.
A user story describes one feature of an app, only focusing on the intended use and not at all about the implementation.
Here is a framework given from Flatiron’s planning resources:
As a
type of userI wantsome goalSo thatsome reason
Write out one of these for every feature of the app. For example:
“As the project owner, I want to assign tasks to team members to ensure the team is clear and the project will be completed.”
2. Create Subtasks
Now that the user stories are mapped out, we can create subtasks under each one that outline the steps that need to be taken to complete the feature.
This will create a plan for building one feature at a time; getting it up and running and only then moving on to the next. This is the basis of agile development. Find more here.
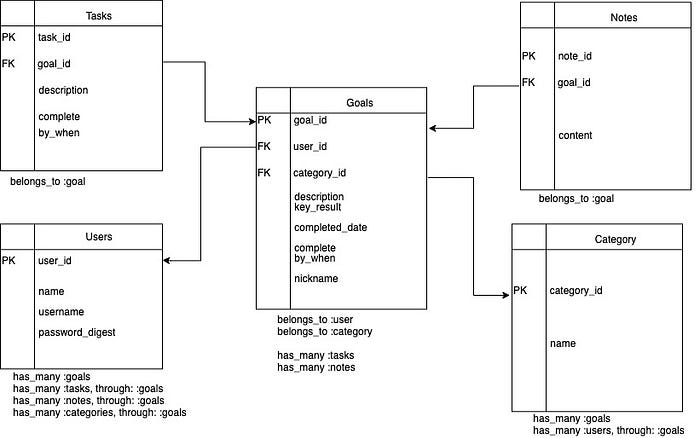
3. Map the Schema
Now that we have the user stories and subtasks, we should have a good idea of the models and associations. Map these out using a service like draw.io to visualize associations.
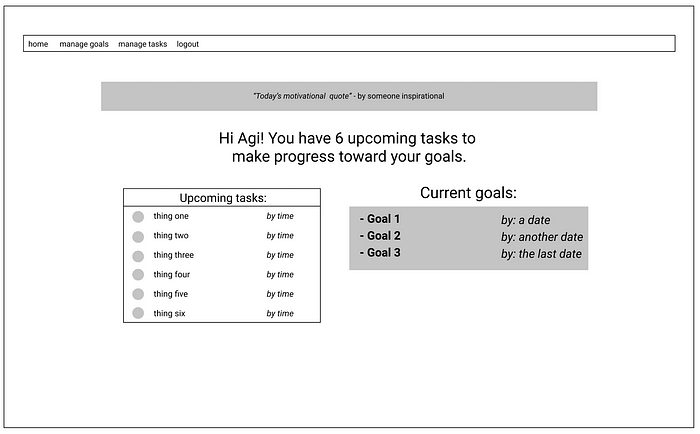
4. Create a Wireframe
A wireframe is a visual representation of the intended framework of a website. You can create a basic one of these with no experience using an intuitive site like Figma.
The importance of a wireframe is that it gives a visual guide of what to work toward. It’s much easier to move a box around with a curser than to write code to figure out if it looks right. This isn’t about being the best UX designer, but rather about putting what is in your head onto paper to have something to work toward.

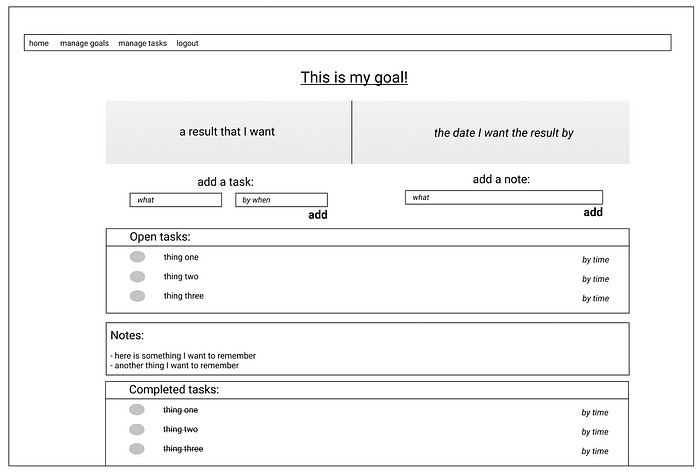
5. Time To Code!
Now that we have a plan, we can start to code! Working in Ruby, I was ready to type ‘rails new’ into the console and start generating models and associations right away.
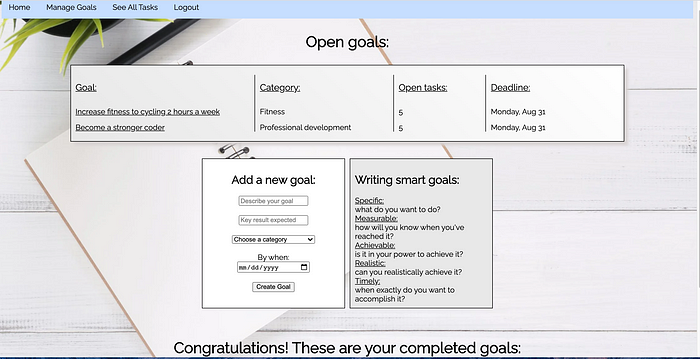
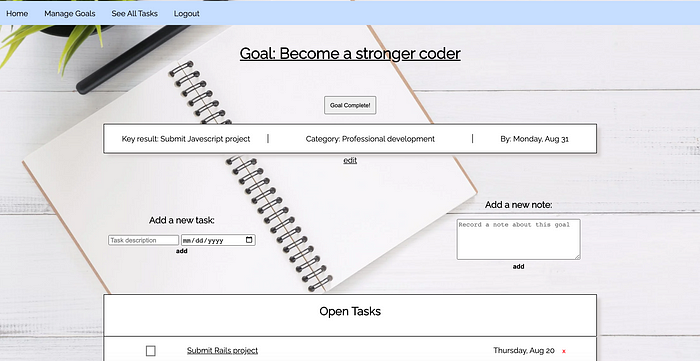
My final product:
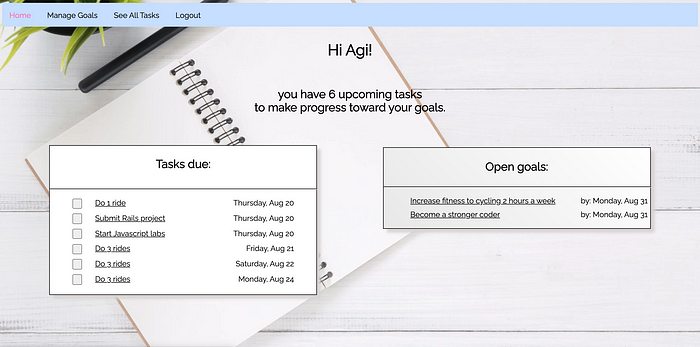
Keep your schema, user stories and wireframe open as tabs and refer to them often. They are your north star. I promise, you will wonder why you didn’t start doing it sooner.